1999 JAGUAR XJ8 3.2
Remote Key Fob
When I got the car - which is now after all 14 years old, there were no remote fobs with it. I suppose that is understandable to some extent but it still annoys me that people are careless with these things and trade cars in with books, keys and fobs missing. Anyway, as I have said before, there have been so many of these cars broken that there must be fobs around for sale. It's not such a big deal to use the key, but in doing so you have to be pretty quick to get the transponder key into the lock before the alarm goes off. All OK if you don't drop the keys or have difficulty reaching in, in our ever shrinking car park spaces.
One of the Jaguar Enthusiasts Club bulletin board members came to the rescue with an old fob of the correct type - early ones have the prefix LJA, whilst later cars use the LJE version. The programming technique is quite straightforward and is outlined below:
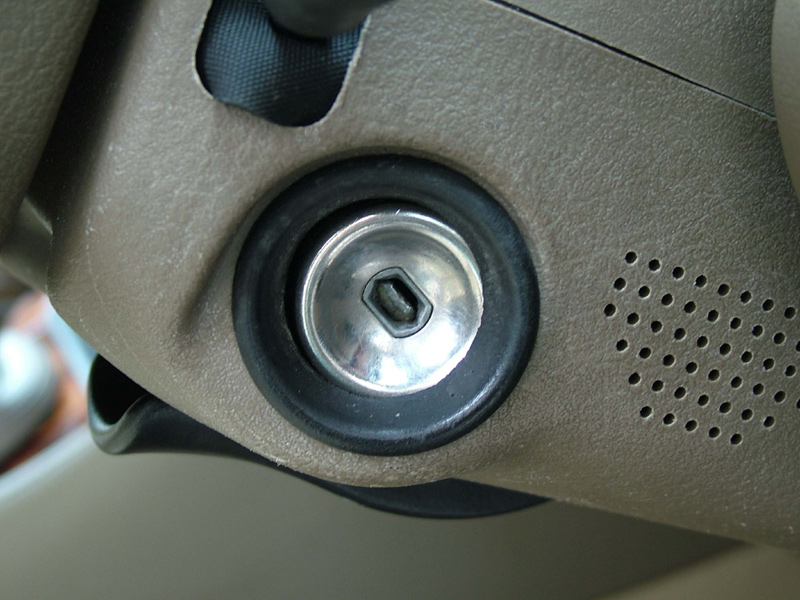
1, Make sure that little flap in the ignition barrel closes inside the hole - if it is sluggish or stuck then a little lock lube and working the key in and out a few times usually does the trick. This flap must be shut otherwise the locking module will think there is a key in and not allow the system to go into learning mode.
2, Get into the car with the key and remotes to hand and make sure ALL doors, bonnet and boot are properly closed.
3, Pull the headlamp flasher stalk towards the steering wheel and hold there
4, Now put the ignition key in and turn to position 1 (acc with no dash lights on)
5, Release the headlamp flasher and flash FOUR more times - the tell-tale LED on the left of the J gate gear selector should flash ONCE
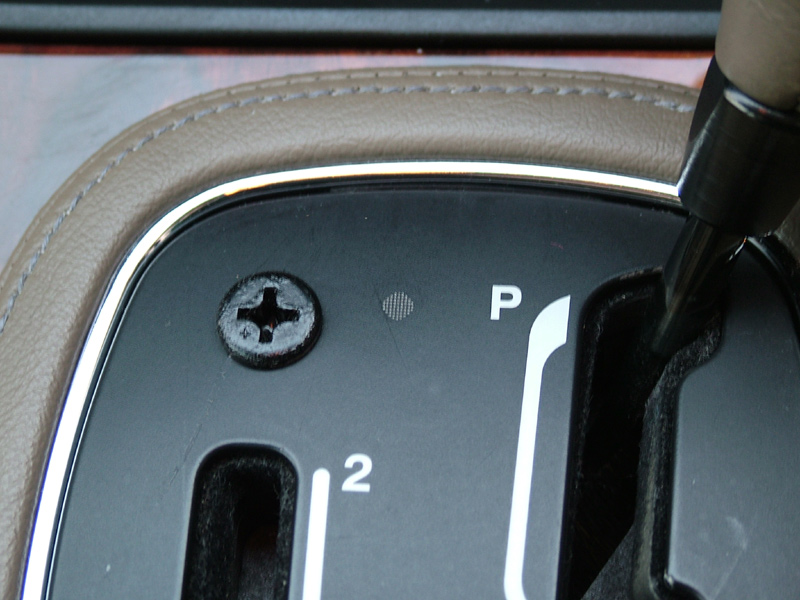
The LED is shown here between the interlock release blanking screw and the P (park position)
6, Now press the lock button on the remotes a total of FIVE presses (one remote 5 times, 2 remotes, 3 on one and 2 on the other etc. The J gate LED will flash at each button press.
7, Remove the ignition key and the J gate LED will flash ONCE more as it is taken out.
That's it - job done!
I had no success with this but did not know for sure that the fob was functioning or if there was something more serious.
Some time later I bought another fob from a well known Jaguar spares dealer who assured me that they test all fobs before dispatch - that too didn't work on my car! I was not going to spend any more money on second hand fobs and certainly didn't intend buying a new one for well over £100 from Jaguar until I was sure what the problem was. I didn't really have any way of testing that these fobs were working as they have no LED's on them. Another thing to confuse me was that one had 2 CR2016 coin cells and the other had ONE CR2032. No one seemed at first to be able to say which was correct - eventually I found that the 2 CR2016 cells were correct.
I am fortunate that I have a friend in Orkney who is a keen Radio Ham and I asked him if he had any receiver which could detect a 433.92 MHz carrier wave - happily he did and when I went round to his place and tested them, neither fob was detected. The next step was to strip the fobs again and clean the contacts and we got one button (when pressed quite hard) to send a signal which Colin's receiver detected! That was a real result for me and so we gave this fob another clean (twice more in fact) and managed to get all four buttons transmitting although you had to press the buttons quite hard. Yet another cup of tea intervened and then it was out to the car with key and fob. Going through the procedure for programming - now very well imprinted on my memory! we got an instant result, in that the J gate LED now flashed on each fob button press. I now had one working fob - OK, I know the car worked without it, but the feeling was like finding a 1933 Old Penny (not that I ever have, of course!)
I found out later that a better method of cleaning is to use an India rubber (pencil eraser) on the contacts and rubber diaphragm - it does not leave any deposit which might slightly increase the contact resistance. When you think how long the batteries (cells really) in the these remotes usually last, you can probably guess that the current draw when pressing a button is extremely small, so even a tiny increase in contact resistance renders them non functional. I dismantled the working fob again (is this man mad?) and used the India rubber and it now works at the lightest touch. It was now time to attack the still non functional one and I noticed a dry joint on one of the surface mount resistors - re-soldered, cleaned again and now this fob too is working (Yes, I had to reprogram both fobs together to make them both work)
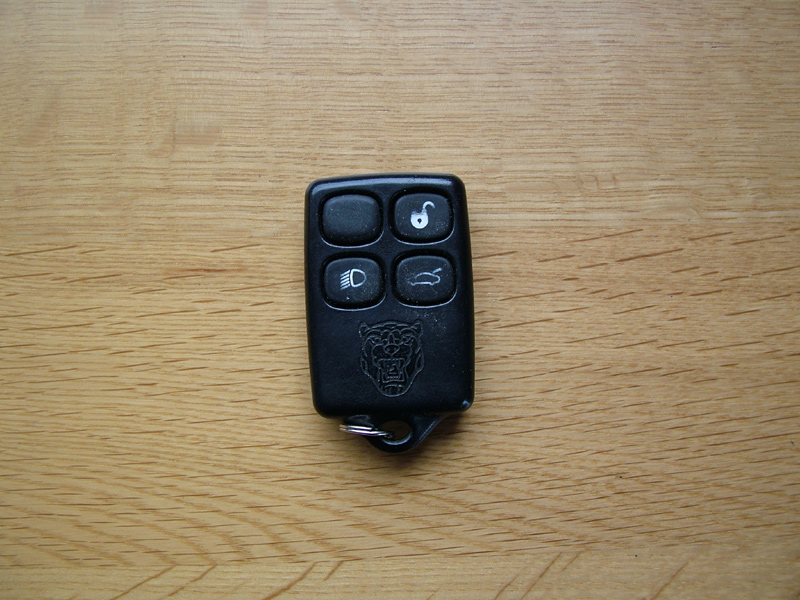
This is the worn but now working fob
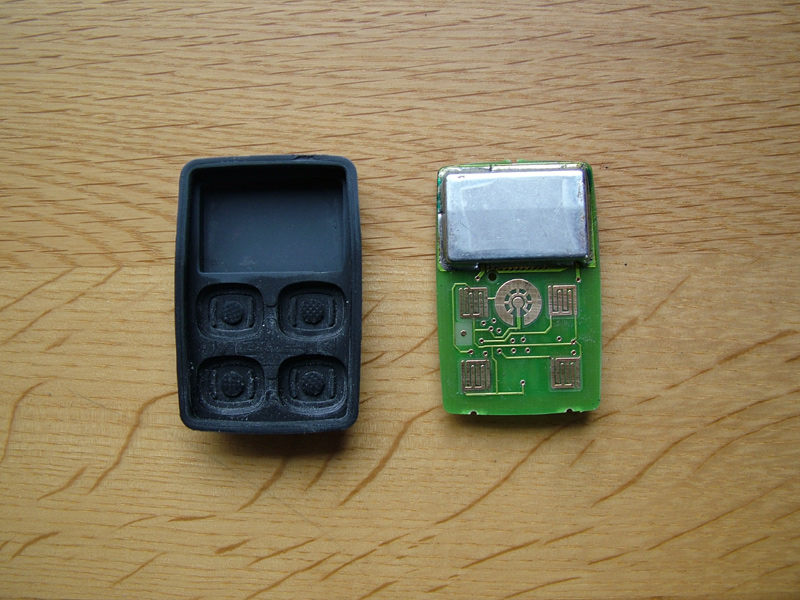
The innards of the fob can be seen clearly here and the inside of the carbon impregnated rubber diaphragm has just been cleaned with the India rubber but the dust has not yet been blown off. The contact side of the circuit board has been cleaned in the same way. When you press a button the pad rests on the contact grid and connects the two grids of that particular contact.
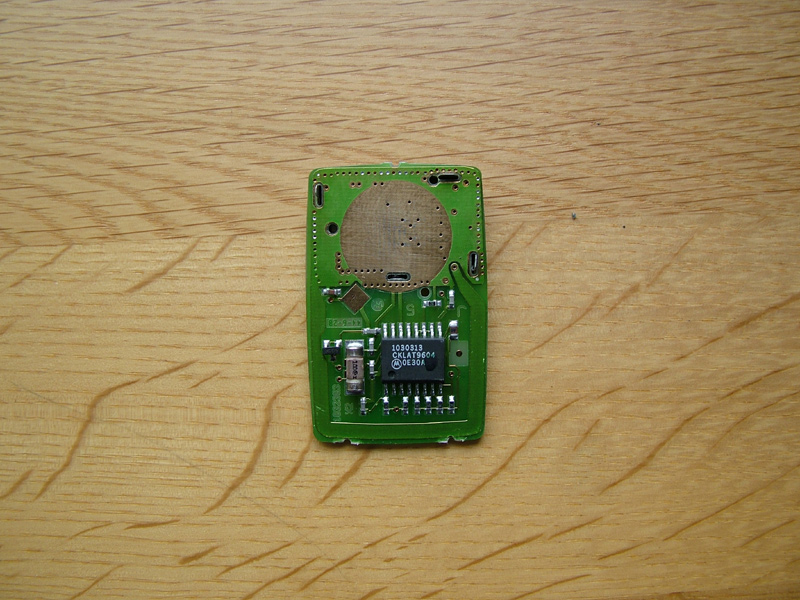
The other side of the board shows the very large battery negative (-ve) contact and the much smaller diamond shaped one is the battery positive (+ve )which is where the little spring blade under the batteries pushes against. The offending dry joint was on the resistor to the left of that diamond pad. I doubt if that is a common fault - I was just unlucky but it might be worth a look if all else has been tested and cleaned.
All in all, like most jobs on this lovely car, a very satisfying result and living in Orkney where we are blessed with dark skies and can regularly see the Milky Way, the headlamp button on the fob is very useful when returning home late at night.